How to customize email content when a Google Form response is received
With Google Form Notification add-on you can craft personalized and highly customizable email notifications tailored to your needs. Following are a few of the things you can utilize to customize the Email body.
Email Customization with HTML
Form Notify allows you to elevate your communication by customizing email content using HTML. Unleash your creativity to design visually appealing and engaging emails that resonate with your audience.
Include Entire Form Response or Specific Answers
Take control of the information you share by choosing to include either the entire form response or specific answers in your email notifications. This flexibility ensures that your communication is relevant and focused on the details that matter most to you.
Utilize Static and Dynamic Expressions
Form Notify empowers you with a range of static and dynamic expressions, automatically populated for your convenience. Easily access these expressions through two separate drop-downs, enabling you to personalize your email content with ease.
Default Email Template or Complete Customization
While Form Notify comes with a default email template that neatly organizes user answers in a tabular format, you have the freedom to go beyond. Fully customize your email template to match your brand identity or communication style. The possibilities are endless!
Creating or Editing Processors - Customizing Email Body
When you create or edit a processor, seize the opportunity to define the content of your email messages. This is the crucial step where you shape the narrative that goes out when someone submits a new form. Make it compelling, informative, and tailored to your unique requirements.
Remember, Form Notify is designed to put you in control, allowing you to communicate effectively and professionally with each form submission.
You can customize the Email Body using two different type of template editors
WYSIWYG or Rich Text Editor
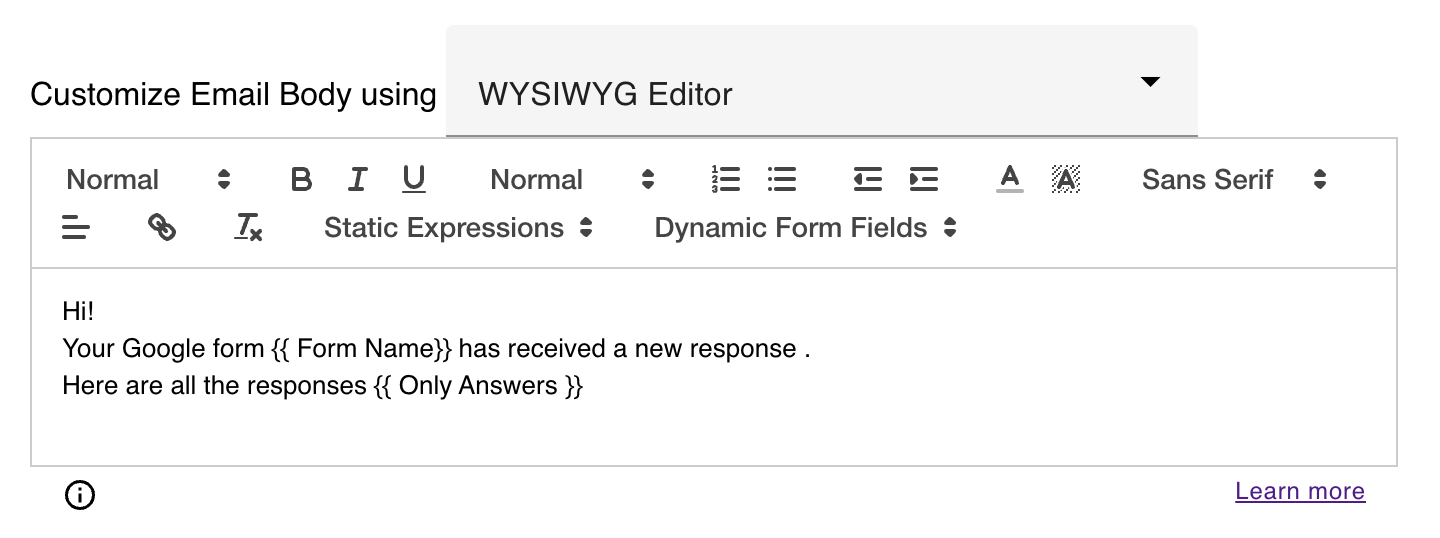
Using this editor you can format your email body message as rich text content . This is similar to What You See is What You Get (WYSIWYG) editors.
HTML Editor
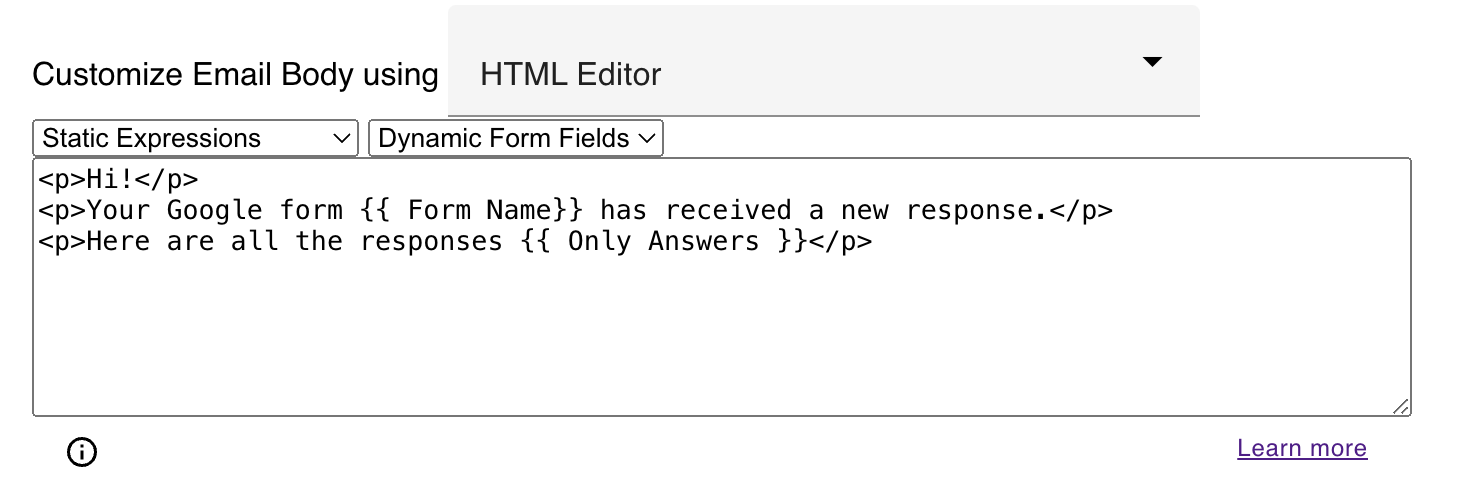
Using HTML editor you can design powerful html content for your email .This is useful for some one who knows how to write html.
- Be careful to test your HTML properly as Emails may not support all the HTML syntaxes .
- Use inline styles
- Do not use html ,head ,body or style tags as regular htmls .
Let's see an example .
Lets say you have a Google Form and you are capturing three fields Namely Name , Age , Address
Given below is a sample HTML code that has an Image , a Table and a Footer.
<div style="font-family: Arial, sans-serif; background-color: #f2f2f2; margin: 0; padding: 0;">
    <div style="max-width: 600px; margin: 0 auto; padding: 20px;">
        <div style="text-align: center;">
            <img src="https://fakeimg.pl/75x30/2854cc/ffffff?retina=1&text=Form Notify&font=noto">
        </div>

        <div style="margin-top: 20px;">
            <p style="text-align: center;">Lorem ipsum dolor sit amet, consectetur adipiscing elit. Phasellus eget justo vitae leo vehicula consequat.</p>
        </div>

        <div style="margin-top: 20px; background-color: #fff; border-radius: 5px; overflow: hidden;">
            <table style="width: 100%; border-collapse: collapse;">
                <caption style="padding: 10px; background-color: #f2f2f2; font-weight: bold; text-align: center;">Table Title</caption>
                <thead>
                    <tr style="background-color: #f2f2f2;">
                        <th style="padding: 10px; text-align: left;">Question</th>
                        <th style="padding: 10px; text-align: left;">Answer</th>
                    </tr>
                </thead>
                <tbody>
                    <tr style="background-color: #f9f9f9;">
                        <td style="padding: 10px;">Name</td>
                        <td style="padding: 10px;">{{ Name }}</td>
                    </tr>
                    <tr>
                        <td style="padding: 10px;">Age</td>
                        <td style="padding: 10px;">{{ Age }}</td>
                    </tr>
                    <tr style="background-color: #f9f9f9;">
                        <td style="padding: 10px;">Address</td>
                        <td style="padding: 10px;">{{Address}}</td>
                    </tr>
                </tbody>
            </table>
        </div>

        <div style="margin-top: 20px;">
            <p style="text-align: center;">Footer Content</p>
        </div>
    </div>
</div>
- Be careful, all the HTML syntaxes may not work since email clients have strict check about certain htmls.
- You can include a URL to embed an image.
- Keep the Html content small otherwise your performance may be impacted.
- Test the final HTML content before sending it to users.
How to include an image from Google drive inside the Email notification for Google Form responses
You may want to include an image in the Emails you send using Form Notify add-on .You can achieve the same in multiple ways . One option is you can use an image hosting service to upload your image and then use the url inside the HTML Editor as shown above.
However hosting the image may cost you money or may not work for every one.
Did you know that you can do that same using Google Drive .Follow the steps below.
- Upload your image to your own google drive .(Better to have these assets in a separate folder , since these files will be publicly accessible)
- Select the File after upload and open the sharing window .(The share button can be accessed by selecting the file and right clicking)
- Once on Sharing window , under "General access" change the option to "Anyone with the Link".
- From the same sharing window click "copy link" to copy the link .
- Paste the link to a text editor and it should look similar to https://drive.google.com/file/d/1xIY_UKoOJ3g7u0LYj5C8cUDn9saEYCFS/view?usp=sharing
- Please note that in the above link ```1xIY_UKoOJ3g7u0LYj5C8cUDn9saEYCFS`` is the unique link of the file just uploaded.
- Use the same file id and create a URL of the formst
https://drive.google.com/uc?export=view&id=1xIY_UKoOJ3g7u0LYj5C8cUDn9saEYCFS - Now use the above URL in HTML Editor to embed the image in the emails you send.
Here is a sample HTML assuming a Google form with three questions "Name" ,"Age" , "Address"
<div style="font-family: Arial, sans-serif; background-color: #f2f2f2; margin: 0; padding: 0;">
    <div style="max-width: 600px; margin: 0 auto; padding: 20px;">
        <div style="text-align: center;">
            <img src="https://drive.google.com/uc?export=view&id=1xIY_UKoOJ3g7u0LYj5C8cUDn9saEYCFS" alt="Image" style="width:100%;">
        </div>

        <div style="margin-top: 20px;">
            <p style="text-align: center;">Lorem ipsum dolor sit amet, consectetur adipiscing elit. Phasellus eget justo vitae leo vehicula consequat.</p>
        </div>

        <div style="margin-top: 20px; background-color: #fff; border-radius: 5px; overflow: hidden;">
            <table style="width: 100%; border-collapse: collapse;">
                <caption style="padding: 10px; background-color: #f2f2f2; font-weight: bold; text-align: center;">Table Title</caption>
                <thead>
                    <tr style="background-color: #f2f2f2;">
                        <th style="padding: 10px; text-align: left;">Question</th>
                        <th style="padding: 10px; text-align: left;">Answer</th>
                    </tr>
                </thead>
                <tbody>
                    <tr style="background-color: #f9f9f9;">
                        <td style="padding: 10px;">Name</td>
                        <td style="padding: 10px;">{{ Name }}</td>
                    </tr>
                    <tr>
                        <td style="padding: 10px;">Age</td>
                        <td style="padding: 10px;">{{ Age }}</td>
                    </tr>
                    <tr style="background-color: #f9f9f9;">
                        <td style="padding: 10px;">Address</td>
                        <td style="padding: 10px;">{{Address}}</td>
                    </tr>
                </tbody>
            </table>
        </div>

        <div style="margin-top: 20px;">
            <p style="text-align: center;">Footer Content</p>
        </div>
    </div>
</div>